When it comes to impressive moves people want to master, one of the most popular is a full split. It’s not surprising: being able to casually drop into a full split is really cool, and photos of you in a full straddle look great on social media. Think this move is only for ballerinas and gymnasts? Think again. Eventually, with consistent practice and the right combo of flexibility exercises, nearly everyone can perform some sort of a split, trainers say.
The period of time needed to achieve a full split differs from person to person depending on their previous movement history, overall fitness and range of motion, and can take from a couple of months to a couple of years. Before you get frustrated by the prospect of such a long process towards reaching your goal, remember that as long as you’re moving in the right direction, you’re already improving!
Getting the splits is totally worth the efforts you put into your stretching routine, and it’s not just about aesthetics or challenging yourself. Yes, mastering them can boost your confidence, but also bring you a ton of essential health benefits:
- Practicing splits increases your hip flexibility and joint mobility that in turn improves the functionality of your everyday moves, such as getting in and out of a car, squatting down to pick up something from the ground, or washing the floor.
- Stretching lengthens and loosens your muscle tissue, improving blood and lymph flows in your lower body. The more flexible you are, the more freely you can not only move, but actually feel and be more in tune with your body.
- During a slow and quiet stretching practice, your mind gets into a relaxing mode, helping you de-stress and connect to the physical sensations caused by the stretches.
Learn How to Do the Splits
The key to getting your splits is consistency. Start with two stretching sessions a week and make sure to give your body two-three recovery days in between. You can adjust the regularity and intensity of your flexibility workouts as you go.
Pay attention to nutrition as it can undoubtedly extend to your flexibility training. Choose healthy, anti-inflammatory foods and stay hydrated to keep your bones, connective and muscle tissues healthy.
Hold each stretch for 20-30 seconds and perform all stretches on both sides to maintain balanced flexibility. Never skip a dynamic warm-up to prepare your muscles and joints for safe stretching. While stretching, always stay focused on proper mechanics to avoid injury.
The muscles you need to work to prep for the splits are hip flexors, adductors, glutes, hamstrings, and groin muscles. Here, we have rounded up two sequences of stretches, with nine moves in each, that can lead you to executing the two most demanded split variations – front split and side split.
How to Do Front Splits
1. Pyramid Pose
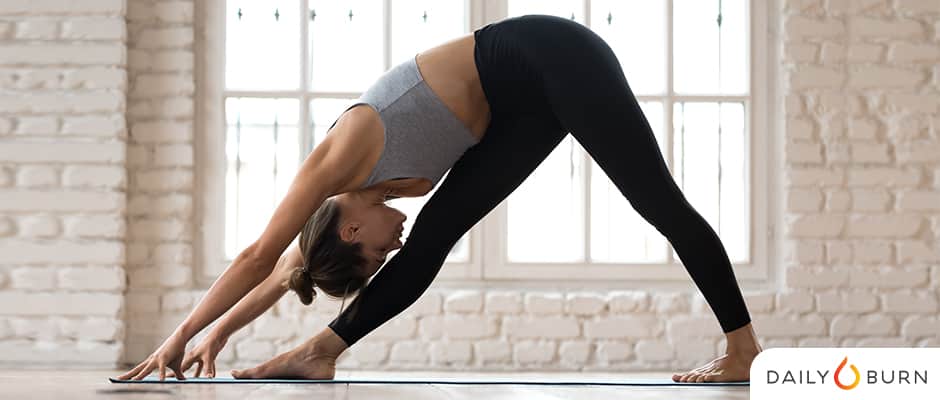
Why: This deep forward fold helps stretch hip muscles and hamstrings and lengthen the spine.
How: Step your right foot several feet forward. Line up heel to heel with your back foot. Hinge at your hips, and begin to fold forward and toward your right thigh. Release your forehead toward your shin.
2. Half Splits
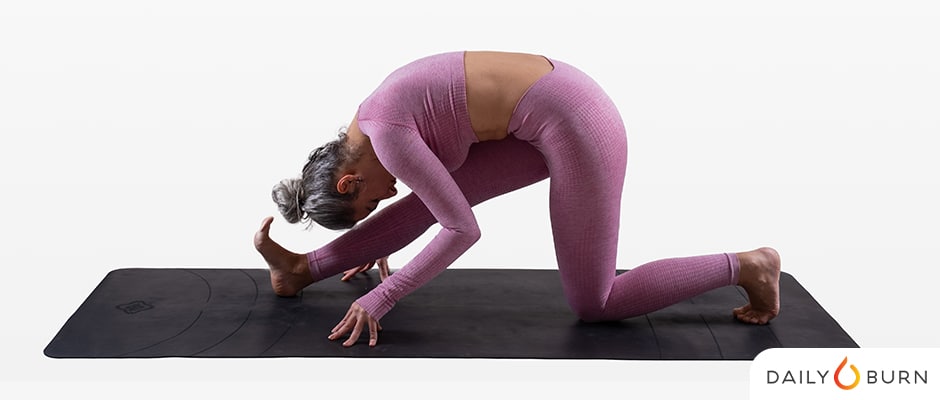
Why: This forward bend stretches your lower back, hips, and legs, and acts as a hip opener, improving the range of motion of your hips.
How: Get on all fours. Step your right foot forward between your hands and begin to straighten it as much as you comfortably can, extending your toes back toward you. Keep your hips square and stacked over your left knee. As you exhale, begin to fold over your right leg.
3. Runner’s Lunge
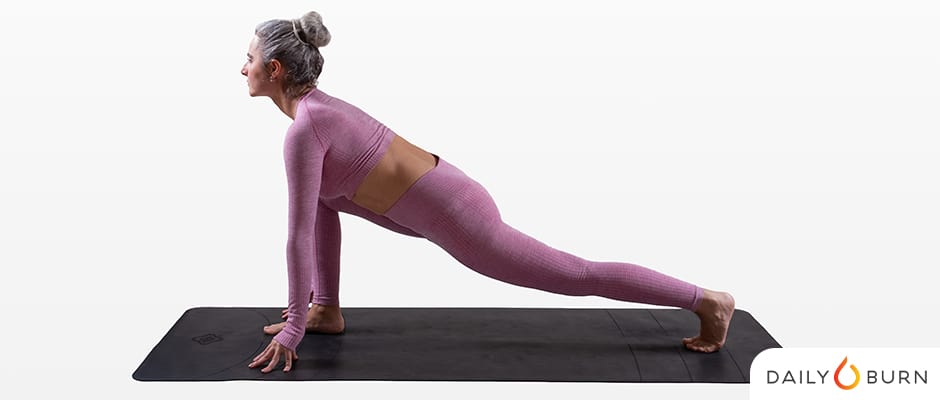
Why: This lunge form stretches and strengthens your glutes, hamstrings, quads, and even muscles in the ankles and core.
How: Begin in a plank position with hands directly below shoulders. Step your right foot between your hands, keeping your knee right over your ankle, and your shin and ground making a 90-degree angle. Straighten your left leg and start gently pressing your hips toward the ground.
4. Low Lunge
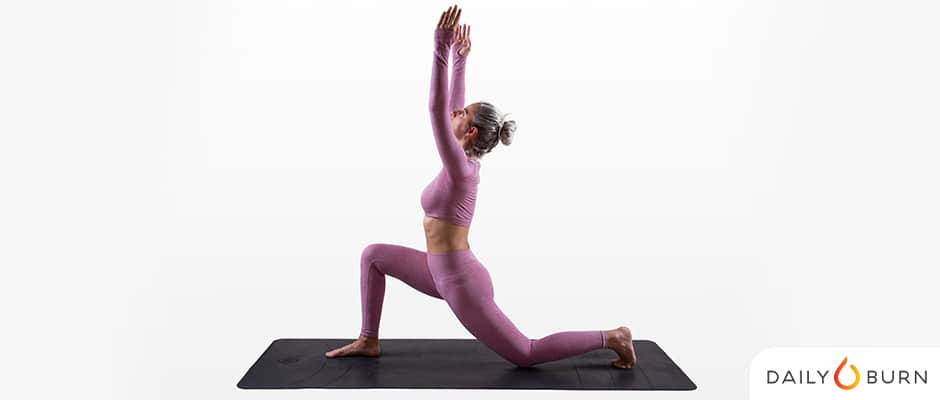
Why: Lunges primarily work the glutes, quadriceps, and hamstrings. As you lower to the ground, these muscles start to lengthen.
How: Bend over and ground your palms in front of you. Step your right foot between your hands. Shift your seat forward, stacking your right knee over your right ankle. Lower your left knee to the ground. Put your hands on top of your right thigh and start gently pressing your hips toward the ground.
5. Seated Hamstring Stretch with Forward Fold
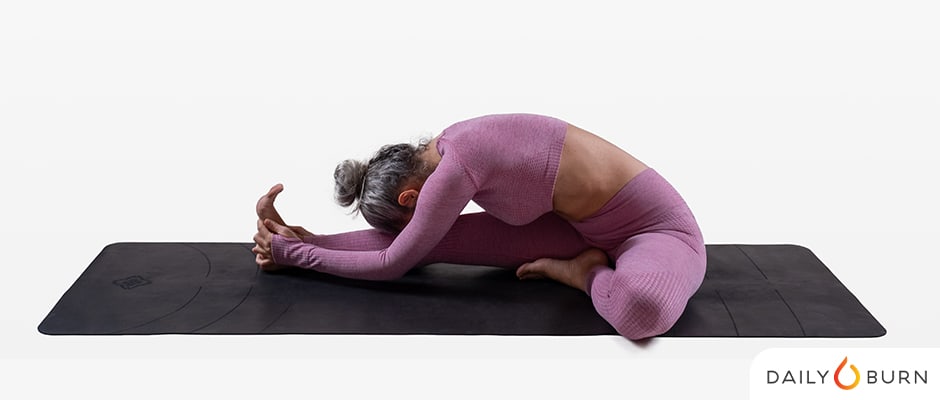
Why: This pose gives the whole back of your body a good stretch, from your calves to your hamstrings to your spine.
How: Sit on the floor and straighten your right leg in front of your body with the heel on the floor. Your left leg is bent at the knee with your left sole facing the right thigh. Straighten the spine by sitting tall and begin to fold forward and toward your front thigh.
6. Supine Hamstring Stretch
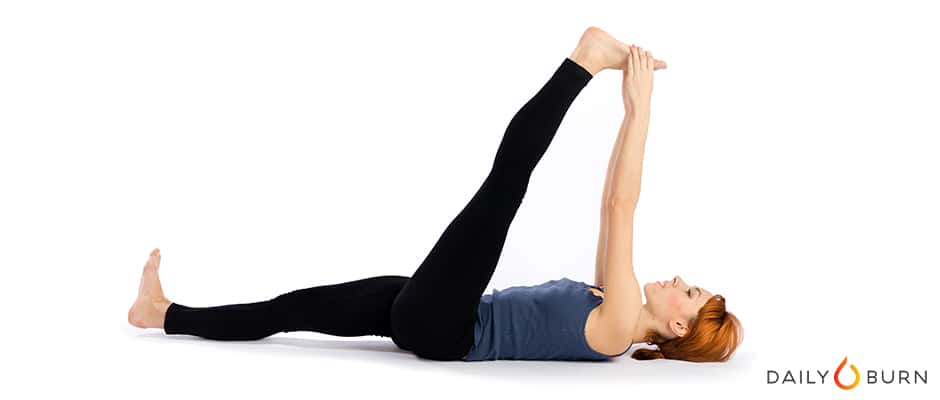
Why: This stretch works your lower back, hamstrings, calves, and ankles – all of these areas are used in your daily life.
How: Lie on your back, with both legs straight on the floor. Lift your right leg and put an exercise band (or your hands if you’re already flexible enough) around your toe and start gently pulling your shin toward your head. Keep the leg straight and centered.
7. Low Lunge Quad Stretch
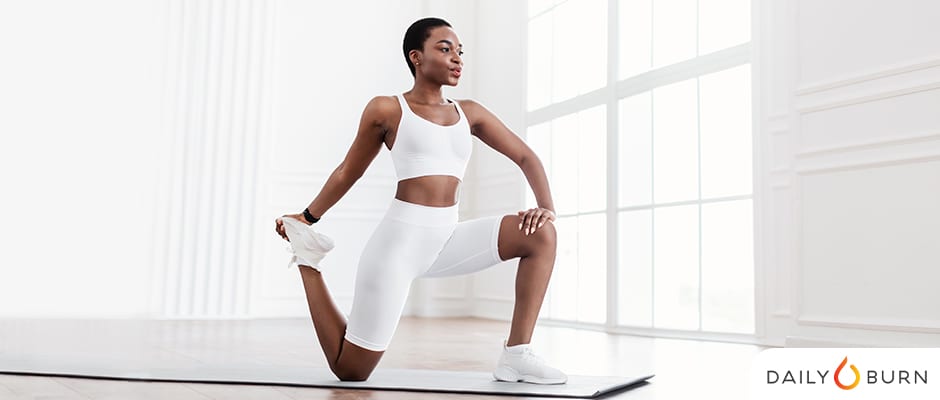
Why: This pose stretches your quads, groins, hip flexors, and glutes, and also strengthens your knees.
How: Step forward with your left foot and lunge down, so your left thigh is parallel to the floor. Rest your right knee on the floor and grasp your right foot with your right hand. Start gently pressing it toward your back thigh.
8. Supported Splits
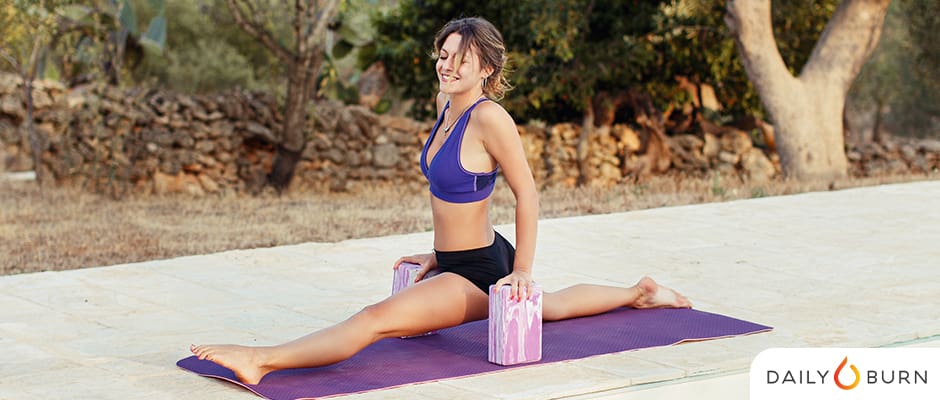
Why: This stretch is a final prep pose for getting into the front split. Use a yoga block for balance and stability of your movements.
How: Sit up and shift your weight back, bending your left knee and straightening your right leg. Place a yoga block under your right thigh (or put your hands on yoga blocks) to control the depth of your stretch. Then start to inch your left foot away from you, coming into split.
9. Front Split
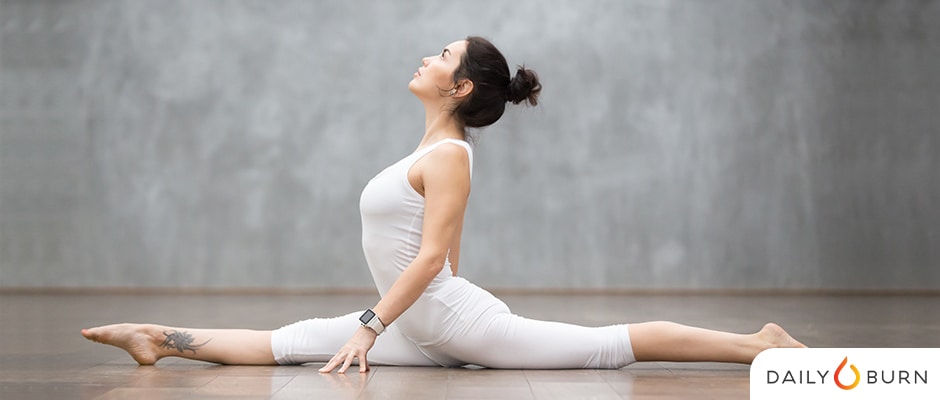
Now it’s time to try to get into the actual front split position. Notice how you manage to go deeper with each stretching session!
How: Start in a low lunge position with your left knee down and the top of your foot resting on the ground. Place your hands on either side of your hips. Begin to glide your right foot forward while pointing your toes, and draw your left foot back while easing your hips toward the ground. Once you feel a deep stretch in the front leg hamstring and hip flexors, stop and hold this position.
How to Do Side Splits
1. Deep Squat
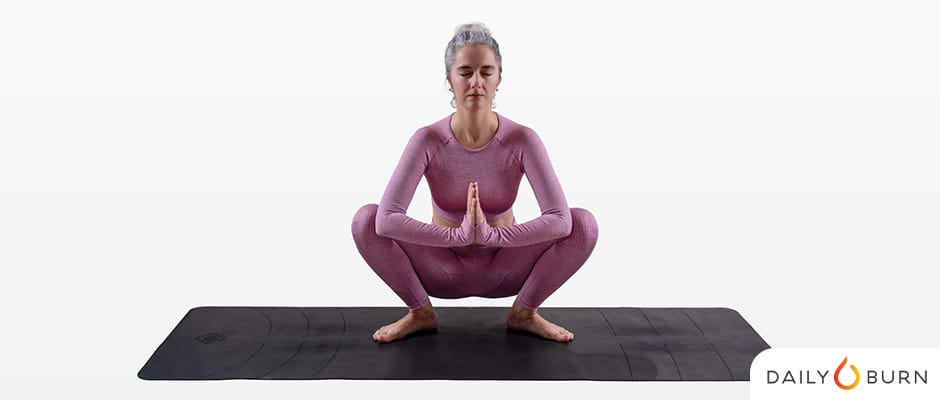
Why: This pose opens your hips and stretches your gluteus maximus, quadriceps, calves, and hamstrings.
How: Step your feet a bit wider than your hips. Squat down and point your toes slightly outward and track your knees in the same direction as your toes. Place your elbows on the insides of your knees and stick your palms together. Begin to press your elbows into the insides of your thighs.
2. Pigeon Pose
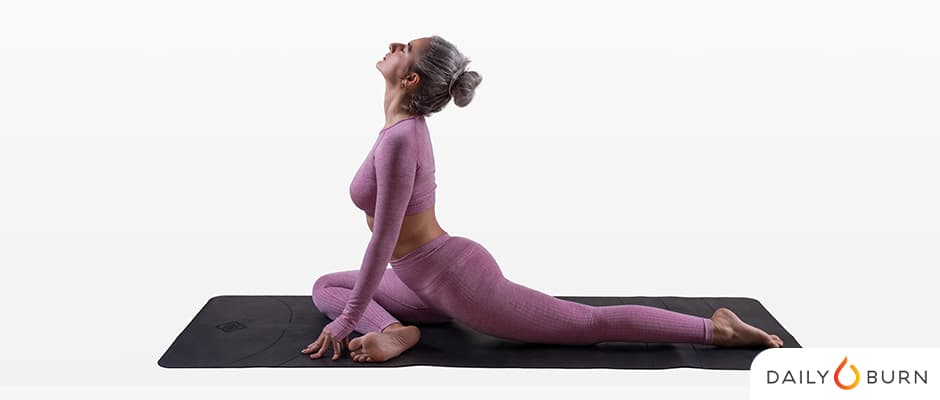
Why: This pose does a great job at opening up your hip flexors, groin muscles, and hip rotator muscles (gluteus medius and minimus).
How: Get on all fours. Bring your right knee left and forward to the left wrist level, flip it over and put the backside up on the floor. Slowly bring your left leg back, straightening your knee and lowering the front of your thigh to the floor. Lower your right buttock to the floor from the outside. Make sure your right heel is directly in front of your left thigh.
3. Butterfly Pose
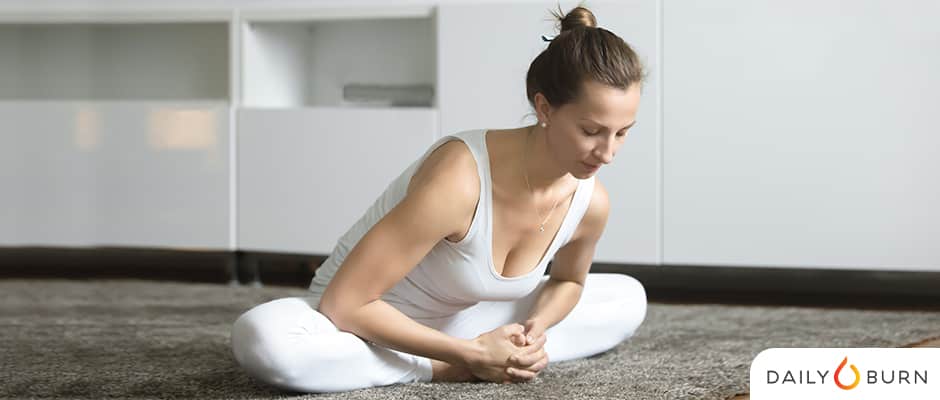
Why: This stretch encompasses the entire hip area and opens inner thighs, back, and hip flexors.
How: Come to a seated position and bring the soles of your feet together. Grab your feet with your hands and place your elbows on your inner thighs. Keeping your spine long, begin to press your elbows against your knees and slowly lower your torso forward.
4. Side Lying Hip Opener
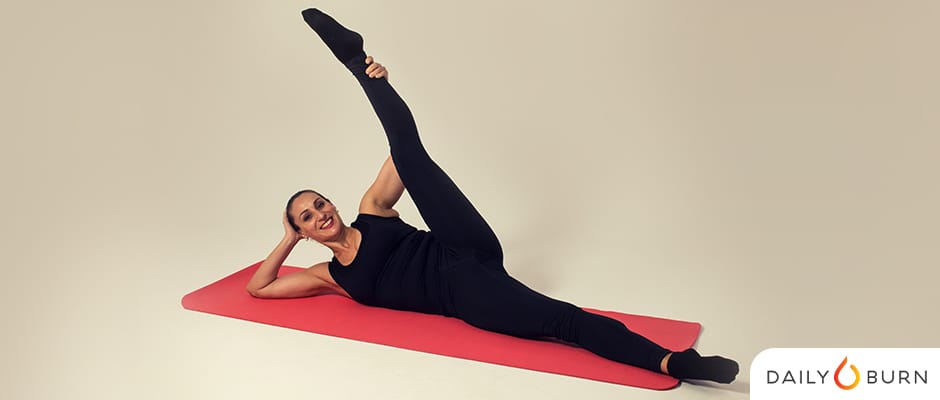
Why: This pose opens up your hips and increases their range of motion.
How: Lay down on your right side making your body a straight line. Keep your hips stacked. Bend your left leg and grab its heel with your right hand. Lift your left leg straight up as far as you can aiming to touch your left ear.
5. Supine Hamstring & Hip Stretch
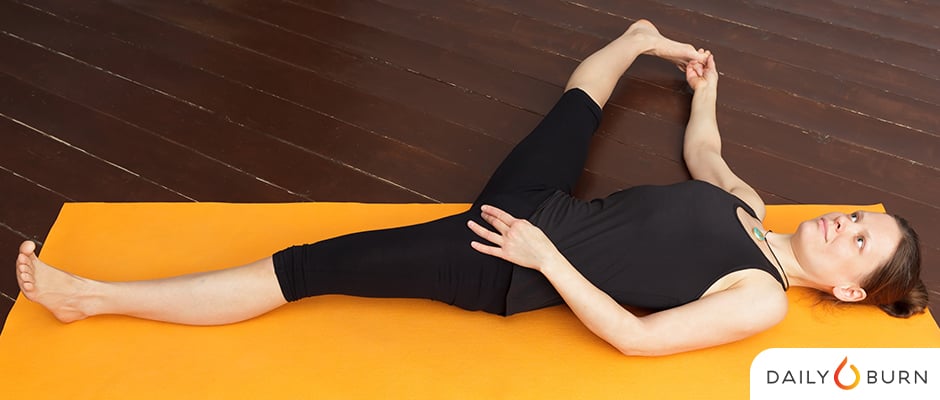
Why: This stretch increases your hip flexors mobility and flexibility, and also works your hamstrings, calves, and ankles.
How: Lie on your back, with both legs straight on the floor. Bend your right leg at the knee keeping it flat on the floor and grab your toes with your right hand. Straighten your leg and take it to the right side as far as you can.
6. Supine Straddle
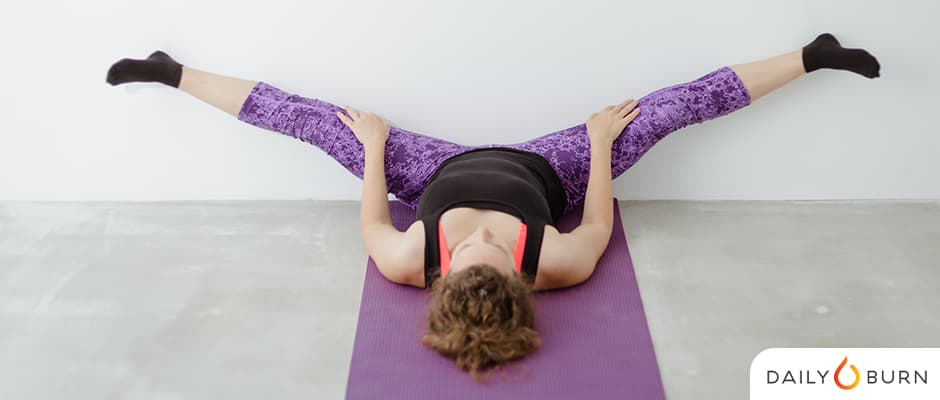
Why: This exercise will stretch your inner and outer thighs, hamstrings, and quads.
How: Lie on your back on the floor with your butt pressed up against a wall and your legs extended vertically on the wall. Spread your legs as wide as you comfortably can. Grab your inner thighs with your hands to help pull you into a deeper stretch.
7. Frog
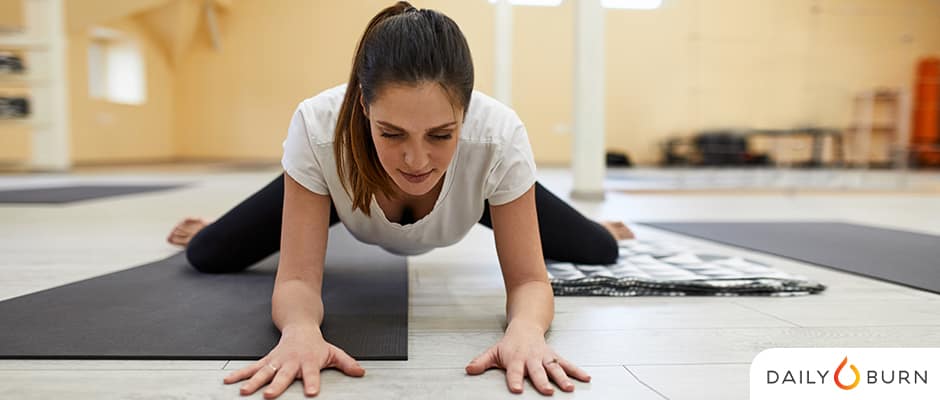
Why: This stretch targets your hip flexors, inner thighs, and groin muscles.
How: Get on your hands and knees, in a tabletop position. Slowly widen your knees out as far as they can go and bring your feet in line with your knees. Your shins should be parallel with one another. Flex your feet and ease yourself forward onto your forearms.
8. Straddle with Reach
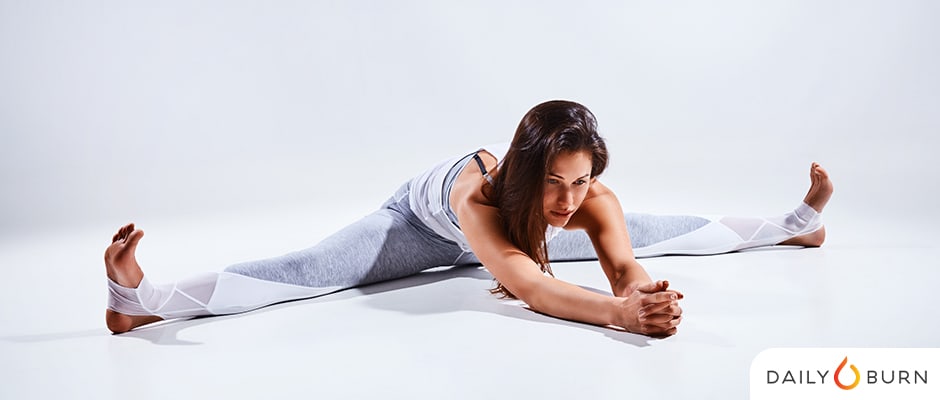
Why: This exercise will stretch your inner and outer thighs, hamstrings, and quads, and help open your hip flexors.
How: Sit down with your feet spread as wide as you comfortably can. Sit tall, draw your belly in, and start going down as far as you can aiming to place your stomach flat on the ground.
9. Side Split
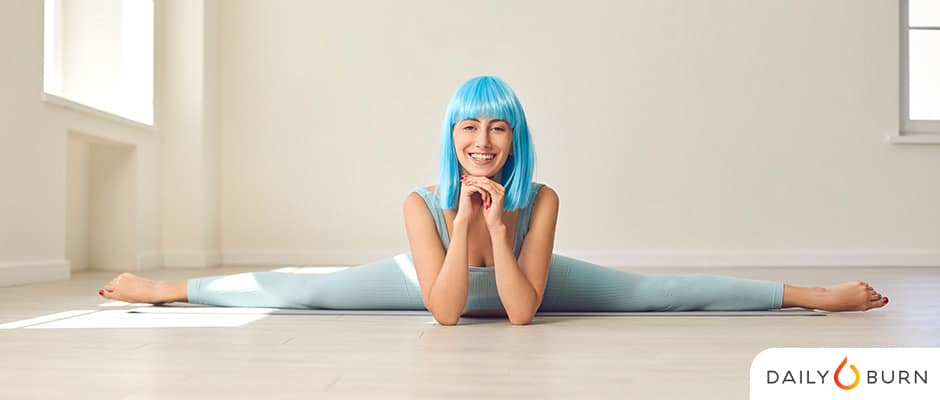
Finally, try to get in the actual side split position. Your goal is to manage to extend your legs in opposite directions, forming a 180-degree angle.
How: Stand tall, and ensure there’s no rotation in your pelvis or hips. Start extending your legs in opposite directions, aiming to form a straight line from your ankles to your hips, aligning your ankles with your knees and your knees with your hips. Keep your torso as elongated as possible. Press your hands shoulder width apart to the ground for support.
Safety Tips and Precautions
When setting a goal to master the splits, remember: it’s a marathon, not a sprint. Know your limits, take your time, and don’t push yourself too hard. Safety first! Pulled, strained muscles and other injuries will slow down your progress if not prevent you from achieving your splits at all.
- If you have any concerns, pains, or injuries related to your hips, hamstrings, glutes, or lower back, consult with a doctor before you start training for splits.
- Avoid overstretching. In each position go as low as possible – without pain. You should feel a good, intense stretch, but never pain!
- Steer clear of bouncing in any stretching position as it causes unnecessary muscle and joint stress.
- Make sure to engage your core muscles – they can help stabilize your upper body and reduce the risk of injury to your lower back.
- Avoid having a partner push you further into the splits. This exercise should be performed slowly and with control.
- Wear the right clothes so they move with your body while you stretch. Put on either something baggy, or elastic.
- Wear socks to allow your feet to slide along the floor more easily, helping you to achieve a deeper stretch.
- Until you master your regular splits all the way on the ground, do not perform over-splits, placing your front foot onto an elevated surface.
You’re on your way to deeper flexibility, and an impressive new party trick to bust out for social media.
Not a Daily Burn member? Sign up at dailyburn.com and start your free 30-day trial today.
Cover image by Daily Burn. Feature images via Shutterstock
